
Table of Contents
KeePassXC usage guide
KeePassXC (and other compatible apps) bases its operation on files, specifically .kdbx, the actual database.
The user will be asked to remeber only a single password, the database one, the others will be automatically saved and managed by the password manager.
A KeePassXC database need to be unlocked and running in the background to work properly.
Installation
KeePassXC is available for Windows, MacOS, Linux and Android:
It also provides a browser add-on for autofilling:
Database creation
- Click on “+ Create Database”
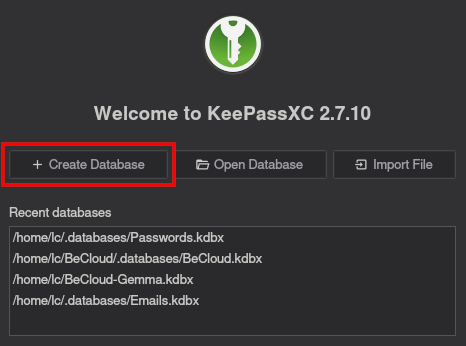
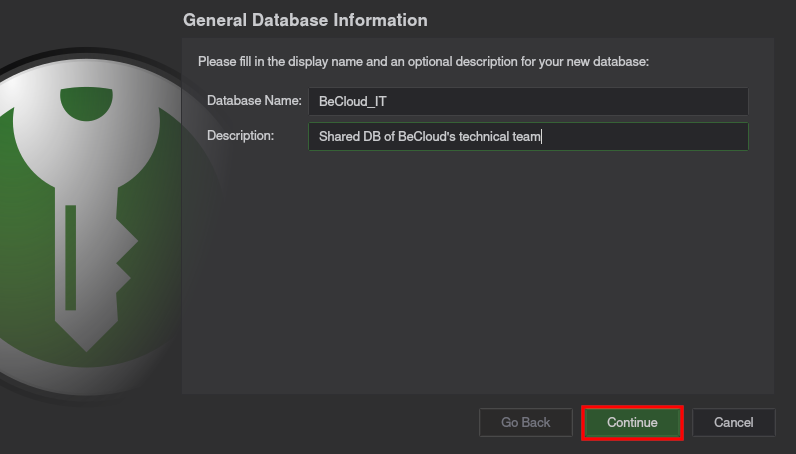
- Give it a name and optionally a description and click “Continue”
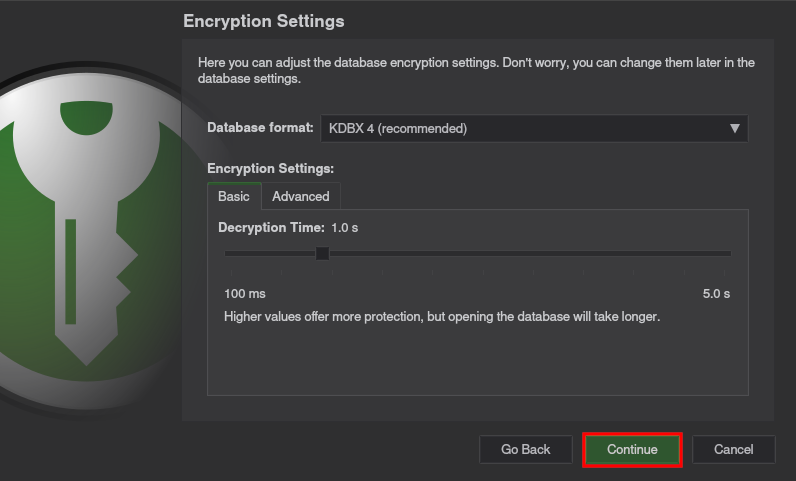
- Simply leave the default “Encryption Settings” and click “Continue”
- Then create a secure password to unlock the DB and click “Done”
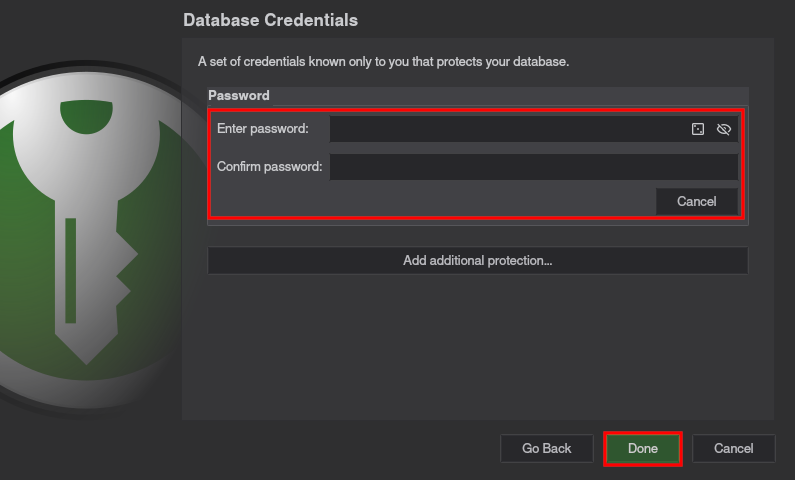


At this point, you need to save the database in a folder. My advice is to create a dedicated folder similar to “.databases” in a secure location that will not be deleted or moved (the dot before the folder indicates a hidden folder).
How to use it

- Main folder. Right-click to change the name, icon, and create subfolders
- Manually create a new password entry
- Change the selected password
- Delete the selected password
Manually create a new password entry
- Enter the title, username, and URL for auto-fill
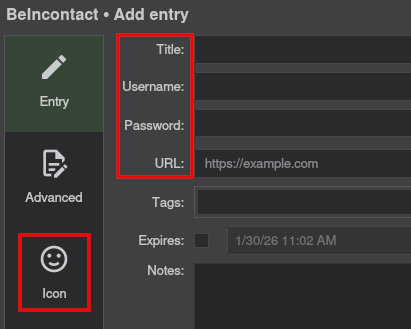
- For the password, click on the dice icon on the right (
 ) and automatically generate a secure password
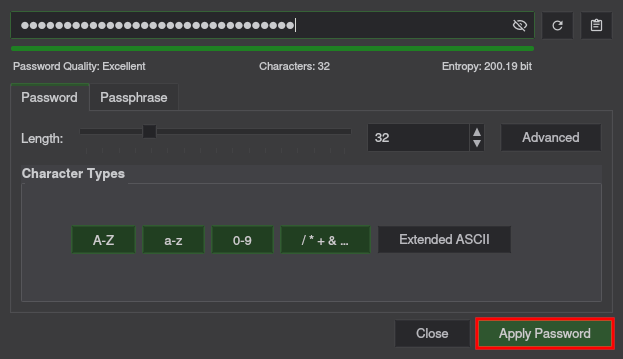
- Then click on “Apply Password” and then “OK” at the bottom right (you can also change the icon)


Automatic fill-in in the browser
Once you have installed the application, configured the DB, and installed the extension on your browser, you need to connect them.
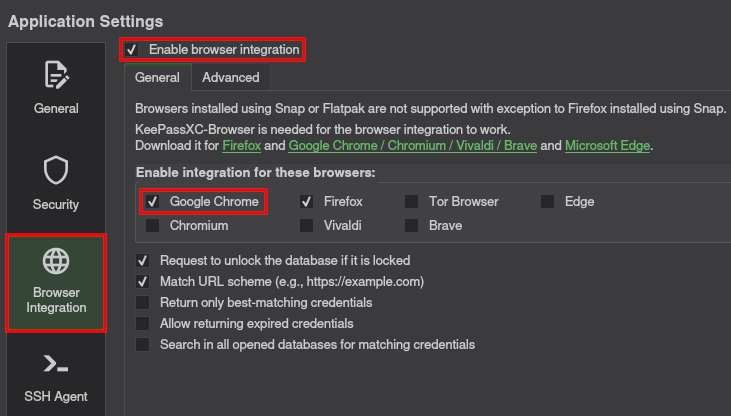
Open the database you want to connect to and keep it open (KeePassXC usually runs in the background), then click on the settings icon ( ) in the top right corner.
- Click on “Browser Integration”, check “Enable browser integration”, select the browser you are using, and then click “OK” in the lower right corner
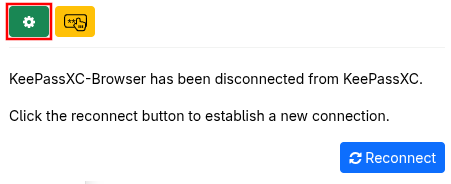
- In your browser, click on the extension icon. The following screen (or an error screen) will appear. Click on the green gear icon
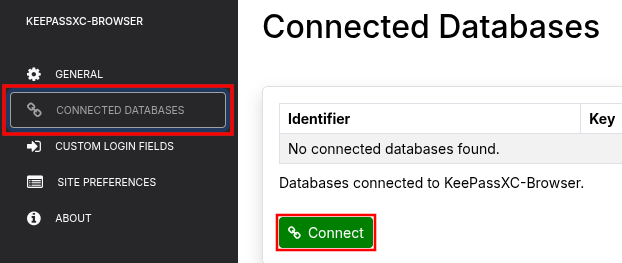
- Click on “CONNECTED DATABASES” and then “Connect” to connect your KeePassXC DB
(Important: This must be done for every database for which you want to enable autofill, so you need to unlock the DB on the application and then perform this procedure)
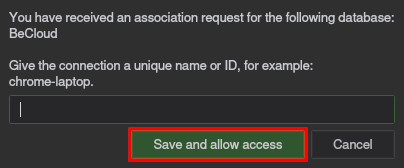
- A popup will appear on the PC application asking you to name the KeePass - Browser connection. Enter a name and click “Save and allow access”
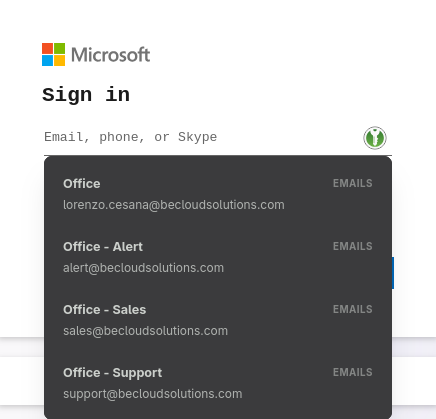
- From now on, when the extension finds a login page that shares the URL with a password saved in the database, it will offer to autofill:
(Important: KeePassXC must remain open in the background to function, and when attempting to enter a password in the browser, it is necessary to have unlocked and selected the correct database)


Automtically create a new password entry
When you log in to a page that is not indexed in the database, you will automatically be prompted to create a new password entry:

Tips
Manually fixing unrecognised login pages
Sometimes an HTML page may be poorly formatted/coded (such as BeIncontact's AgentDesktop login page…), and KeePass will not be able to find the fields correctly.
To solve this, you need to click on the extension and then on the yellow icon ( ) and manually select which field is which. These will then be saved in the DB and remembered.
Here is the full KeePassXC's official guide.
) and manually select which field is which. These will then be saved in the DB and remembered.
Here is the full KeePassXC's official guide.
Backing up the DB
Since the DB itself is a single file I strongly suggest to setup automatic backup with our UGREEN NAS Sync application, you can find the complete guide here.
— Lorenzo Cesana 2026/08/22 15:13